
We have added support to RFID Explorer, RFID Scan Scan Write and RFID Tag Finder for the built-in barcode scanners on Honeywell handheld terminals. The TSL® Apps make use of the Android Intent system and the built-in Honeywell Scan Engine to provide barcode scanner input.
This feature is available on CT40/50/60, EDA50/51 and D75e. No configuration is necessary but older devices may need to upgrade to the latest Firmware and CommonES package.
At the time of writing the versions were as follows:
Command Breakdown:
| Device | Android Version | Firmware | CommonES Package |
| D75e | 4 | PARISAD_[54-56].01.19.0283 | Honeywell_CommonES_Android_3.17.3445 |
| 6 | D75E-M-[68-69].01.22-(0338) | Honeywell_CommonES_Android_Common_4.01.00.4168 | |
| CT40 | 7 | HON660-N-[83-84].00.19-(0169) | N/A |
| 8 | HON660-O-[85-86].00.11-(0108) | N/A | |
| CT50 | 4 | HELSINKIAD_[59-60].02.12.0237 | Honeywell_CommonES_Android_3.17.3452 |
| 6 | CT50-M-[70-71].01.22-(0338) | Honeywell_CommonES_Android_Common_4.01.00.4168 | |
| CT60 | 7 | HON660-N-[83-84].00.19-(0169) | N/A |
| 8 | HON660-O-[85-86].00.13-(0108) | N/A | |
| EDA50 | 4 | eda50-ota-203.01.00.0012 | Honeywell_CommonES_Android_3.17.3321.10_EDA50 |
| 7 | eda50-ota-207.[01-02].00.0020 | N/A | |
| EDA51 | 8 | 212.[01-02].00.0012 | N/A |
Basic operation is available to all the TSL Apps without configuration however, if modified scanner settings are required, follow the steps below to create a custom profile for the App.
Note: the Apps are not affected by changes to the “Default” profile.
Creating a Custom Profile
Using custom profiles allows each App to be configured independently. The steps below show how to create a custom Barcode Scanner profile for use with a TSL App:
1. Open the Settings App (usually a green icon with a white gear/cog)
![]()
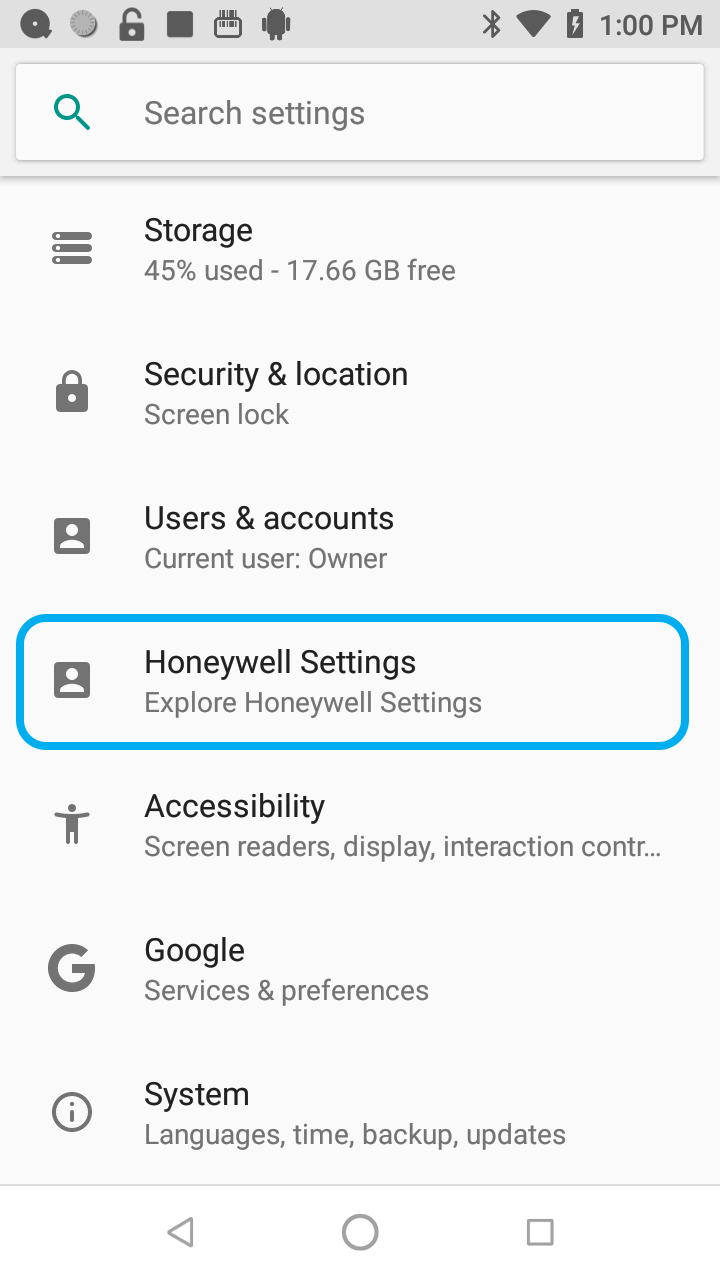
2. Tap the Honeywell Settings row, typically, this is towards the bottom of the list.
3. Tap on the Scanning settings row
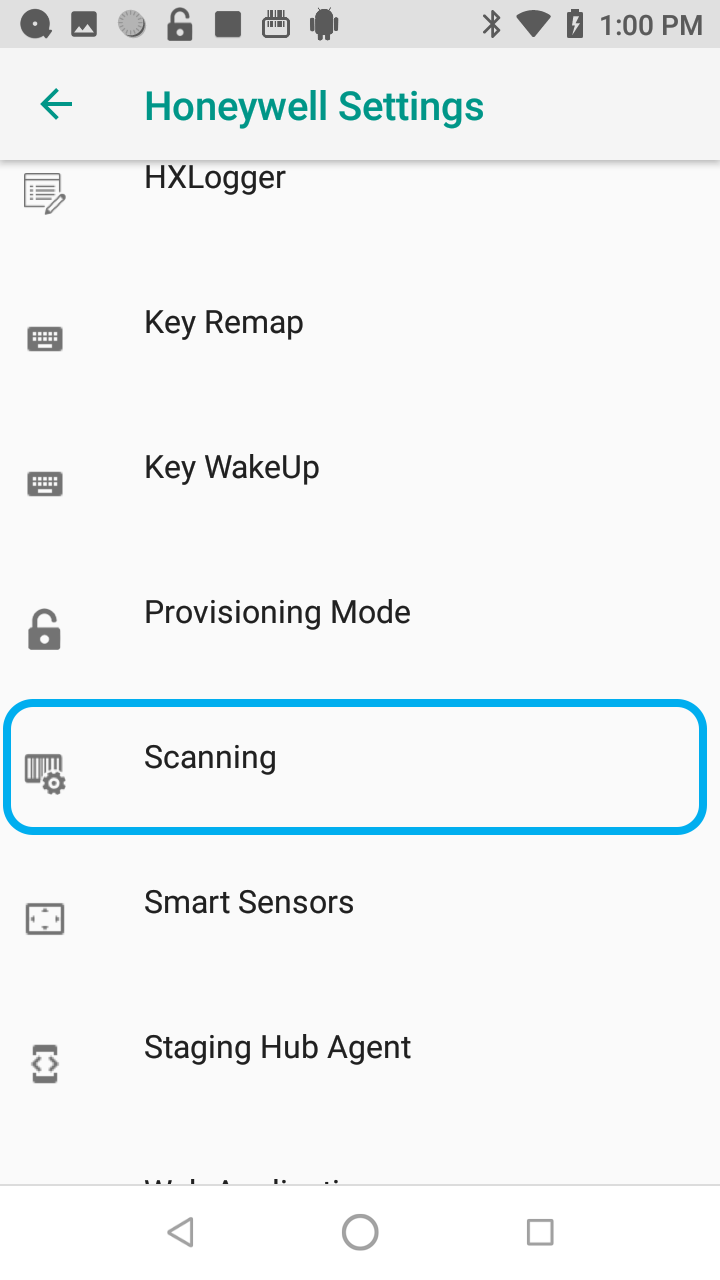
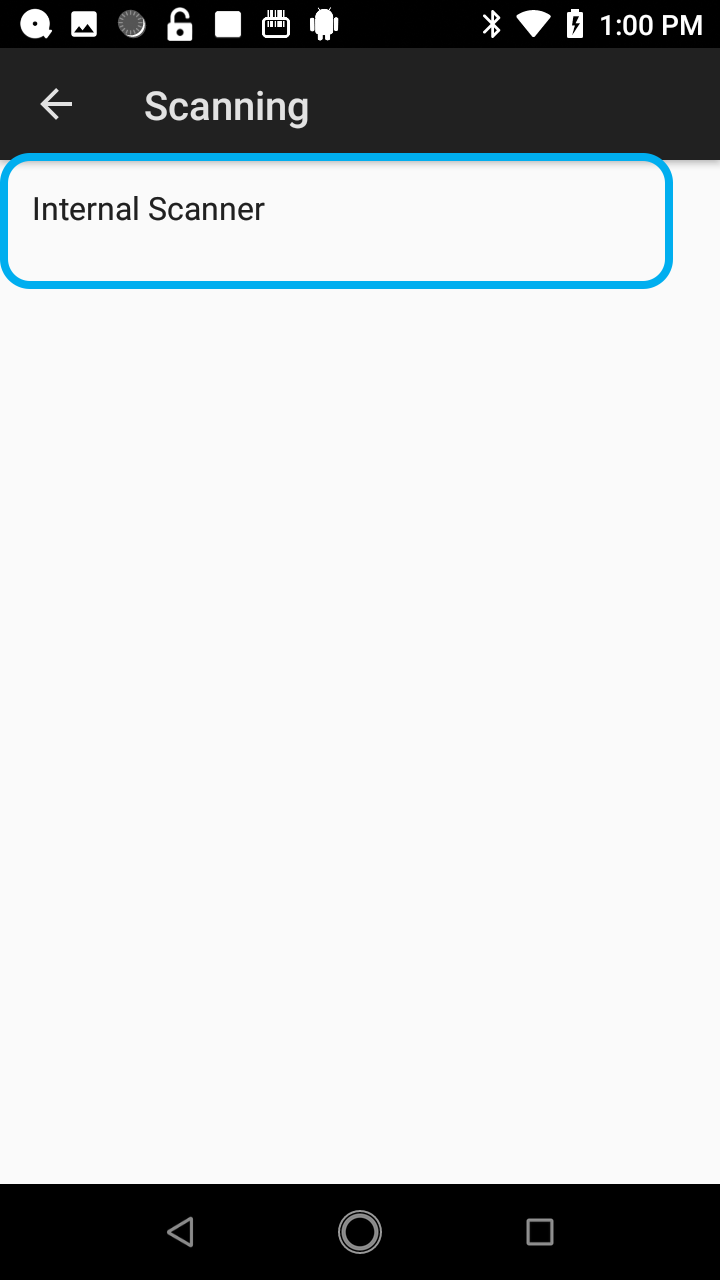
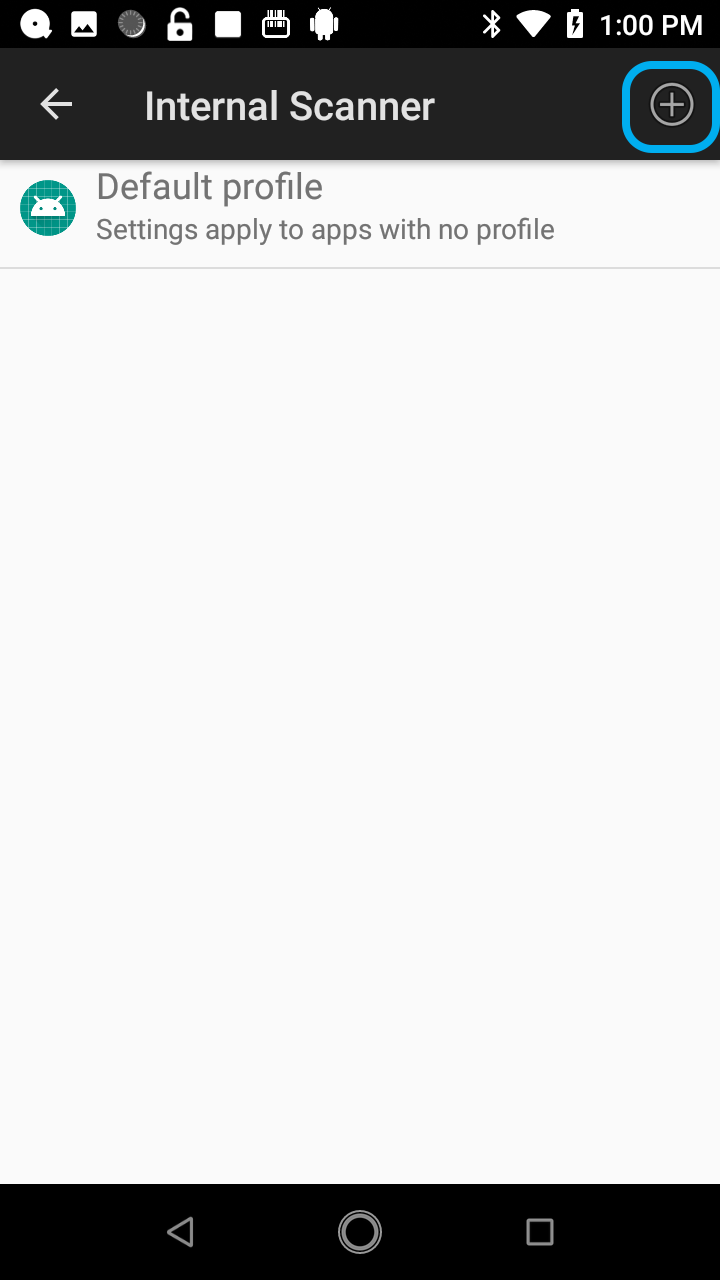
4. Tap on the Internal Scanner row this reveals the profile list.
5. Tap the (+) to create a new profile
6. In the Add Profile dialog, choose the Select an Application option

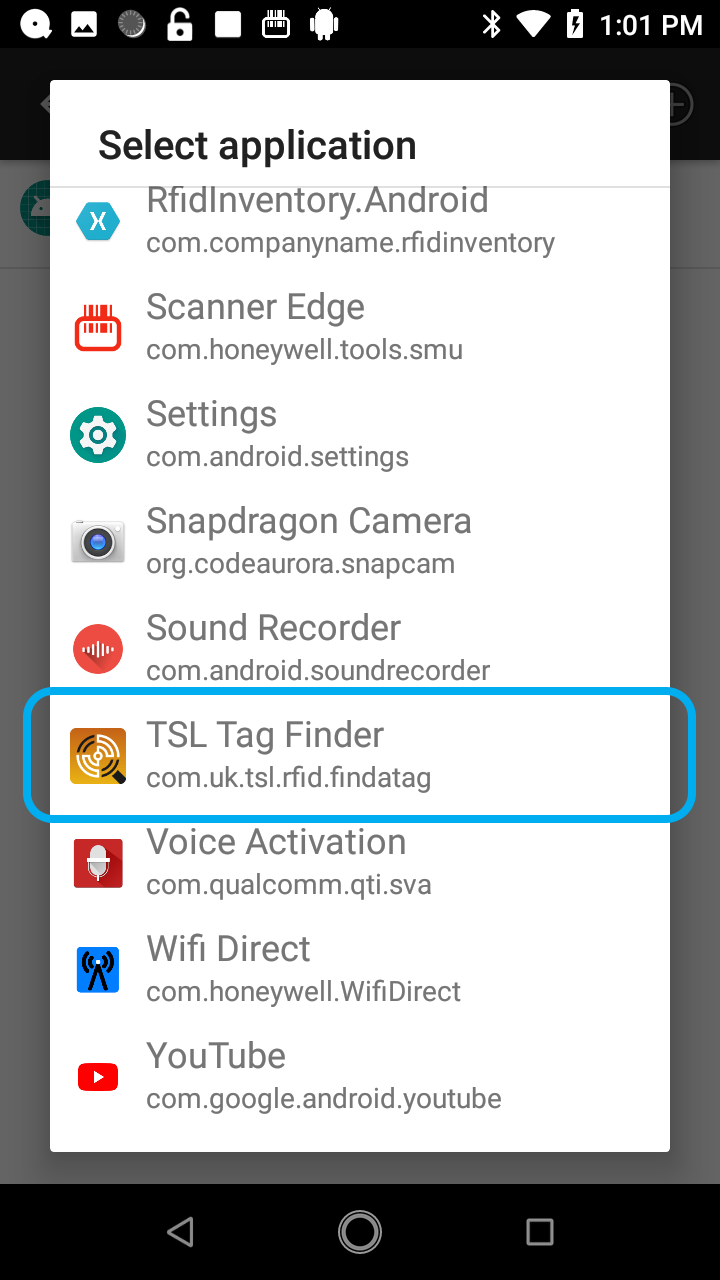

7. In the list that appears, select the TSL application you are using in this example we configure TSL Tag Finder, this will create a new profile.
8. Tap on the newly created profile to edit it and modify its configuration in this example, we will modify the Check Digit option of the UPC-A symbology
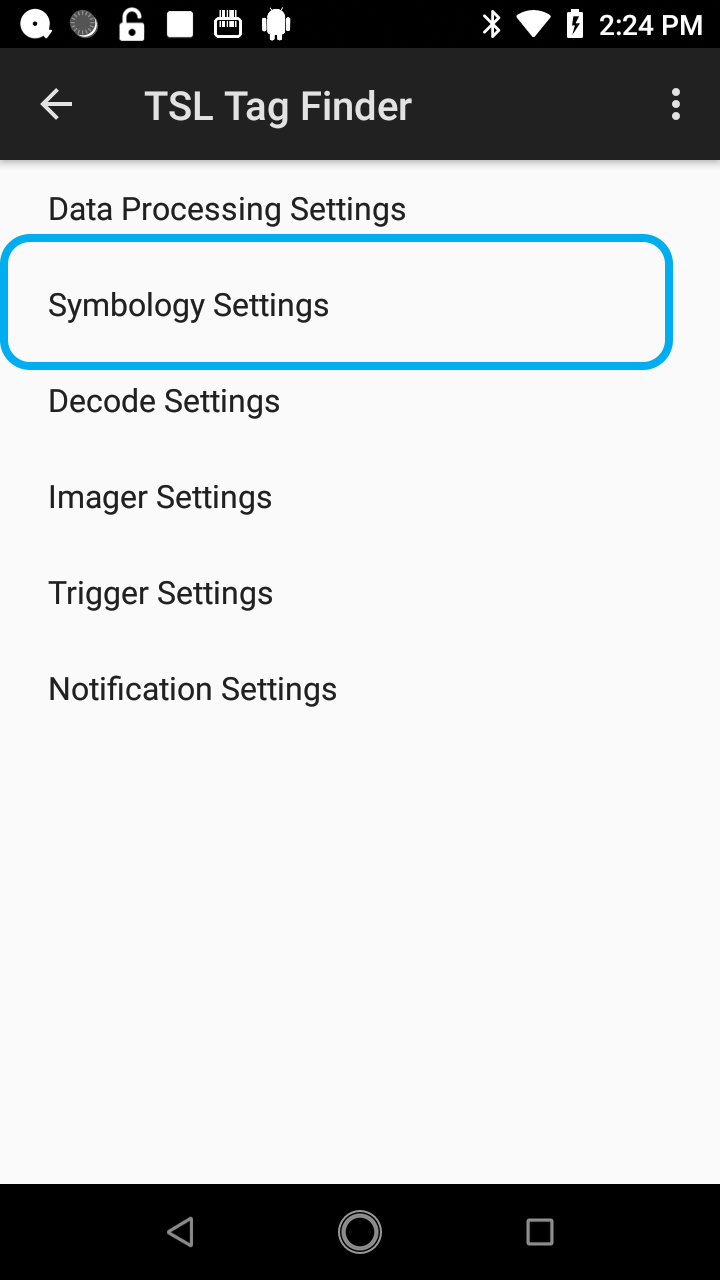
9. Tap the Symbology Settings row
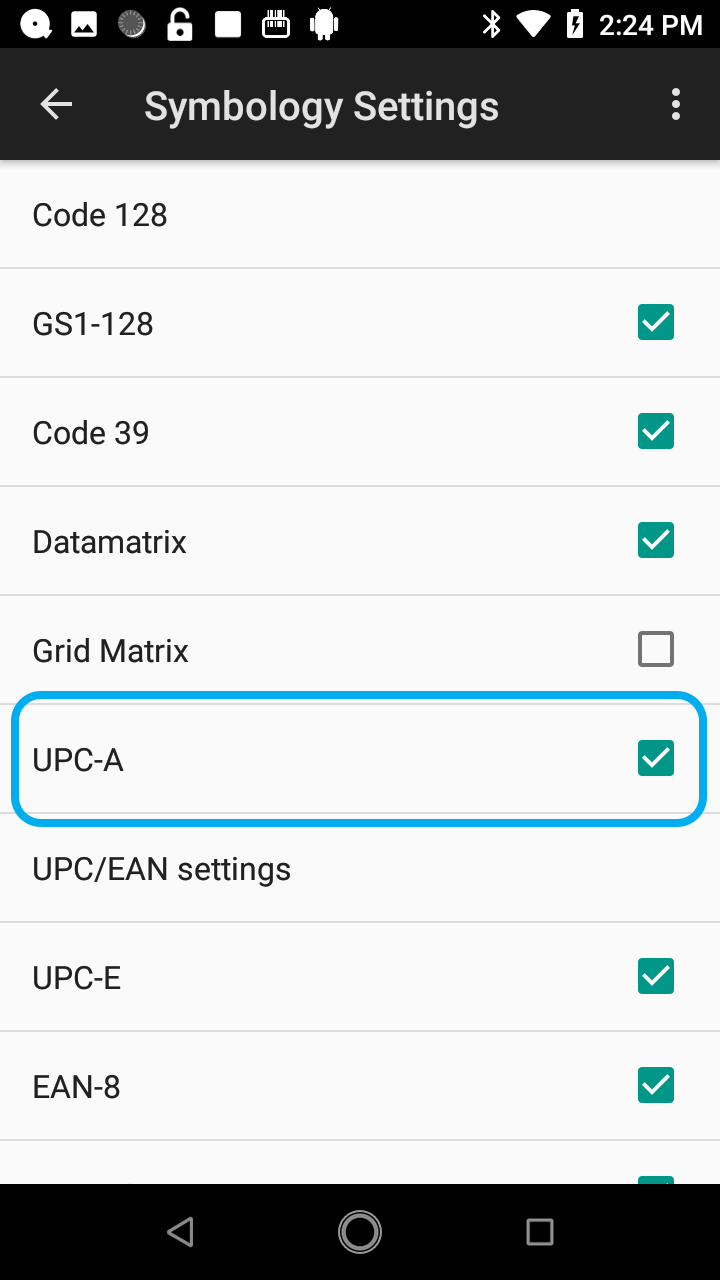
10. Tap the UPC-A row
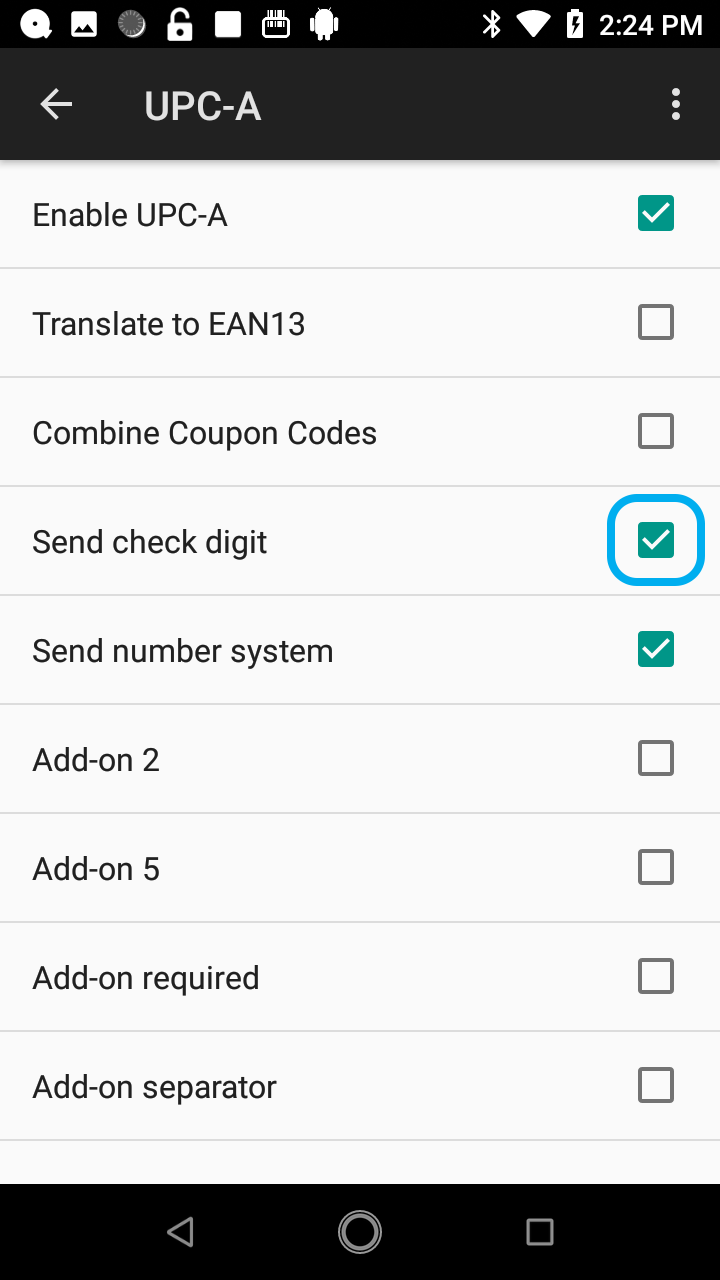
11. Ensure the Send Check Digit option is enabled
12. Use the terminal’s Return button to go back – make any additional changes required.
13. The terminal is now ready for use with TSL Apps!
Note: RFID Scan Scan Write and RFID Tag Finder require that scanned barcodes include the Check digits – this may require modifying several symbology settings e.g. UPC-A, EAN-13, etc…