Introduction
TSL® have added support to RFID Explorer, RFID Scan Scan Write and RFID Tag Finder for the built-in barcode scanners on Zebra handheld terminals. This support uses the Android Intent system and some configuration of the terminal is required.
The TSL® Apps make use of the built-in DataWedge App to provide barcode scanner input. This App has a long history and the instructions below refer specifically to DataWedge Version 6.4 and are based on the online guides that Zebra provide. Refer to the online guide for your particular version of DataWedge for any differences to the
steps outlined below. The full v6.4 setup guide is available here:
http://techdocs.zebra.com/datawedge/6-4/guide/setup/
Import DataWedge Profiles
If you have v6.4 then the supplied profiles for RFID Explorer, RFID Scan Scan Write and RFID Tag Finder can be imported as described here:
http://techdocs.zebra.com/datawedge/6-4/guide/settings/#importaprofile
If you are unable to import the profiles then follow the procedure below
Create a DataWedge Profile For The App
We recommend that a custom profile is created for each App which will allow for independent customisation of the Barcode settings such as enabling/disabling supported symbologies.
-
- Install the app (e.g. RFID Explorer) that will use DataWedge for scanning.
- Start DataWedge app and navigate to the Profiles list (if not shown by default).
- Tap on the Profiles screen’s “hamburger” menu and select -> New profile.
- Enter a name for the Profile (see table below) and tap OK. The new Profile appears in the Profiles list.
| App | Profile Name |
| RFID Explorer | tsl.rfidexplorer2 |
| RFID Scan Scan Write | tsl.ScanScanWrite |
| RFID Tag Finder | tsl.findatag |
-
- Tap on the new profile.
- Select Associated Apps from the Applications section.
- In the Hamburger menu, select -> New app/activity. A list of installed apps appears.
- Select your app’s package name (scrolling down, if necessary) e.g. com.uk.tsl.rfidexplorer2.
- Tap the asterisk (*) to associate all of your app’s activities with DataWedge.
- Tap the device’s Back button until the new Profile’s Settings screen appears.
- Confirm that the “Profile enabled” checkbox is checked.
- In the Barcode Input section ensure that the “Enabled” checkbox is checked
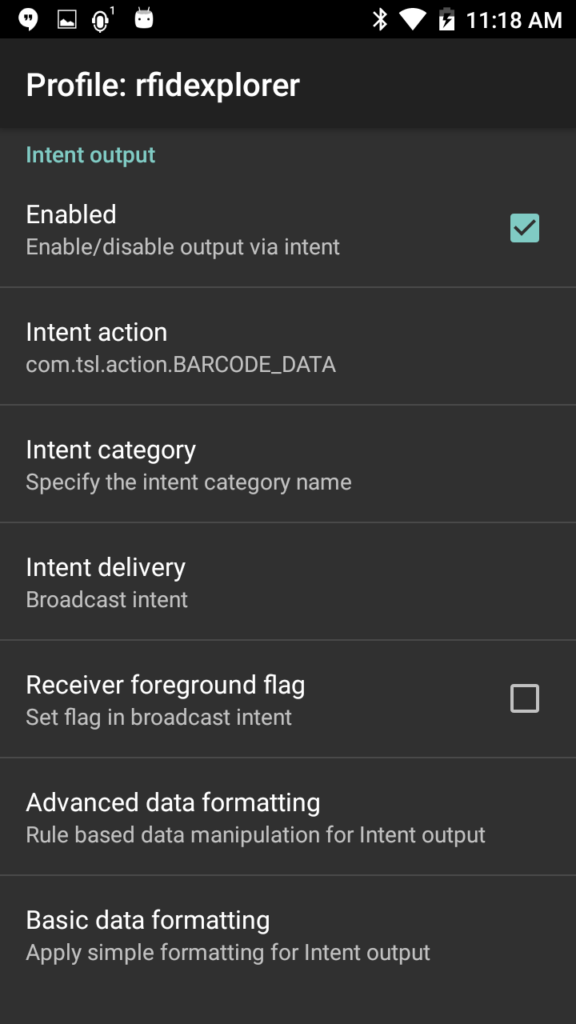
- In the Intent Output section ensure that the “Enabled” checkbox is checked
-
- Tap the “Intent action” option and enter: com.tsl.action.BARCODE_DATA
- Ensure that the “Intent delivery” option is set to: Broadcast Intent
-
-
- Disable all other Plug-ins such as Keystroke output or IP output etc…
- The TSL® app will now be able to use the terminal’s barcode scanner when required.

