Introduction
It is often necessary to change the existing EPC of a tag to a new value to support either standards-based or custom encoding formats. This article provides examples of how to modify the EPC identifier using the TSL RFID Explorer App. RFID Explorer is available for iOS from the App Store, for Windows UWP from the Windows Store and RFID Explorer 2 for Android is available from the Google Play Store.
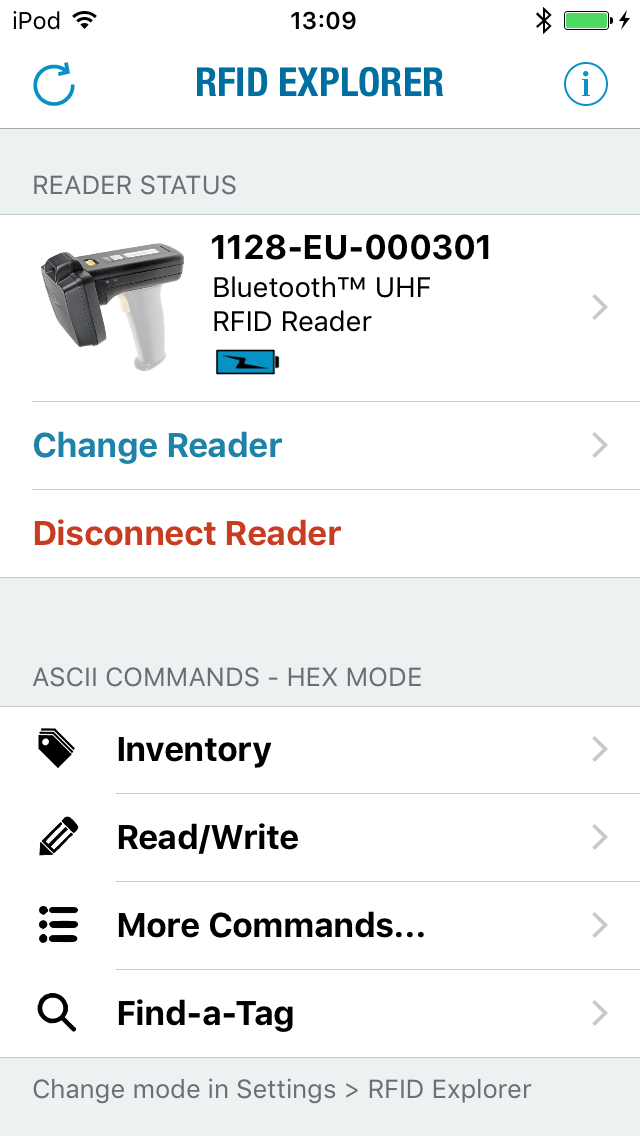
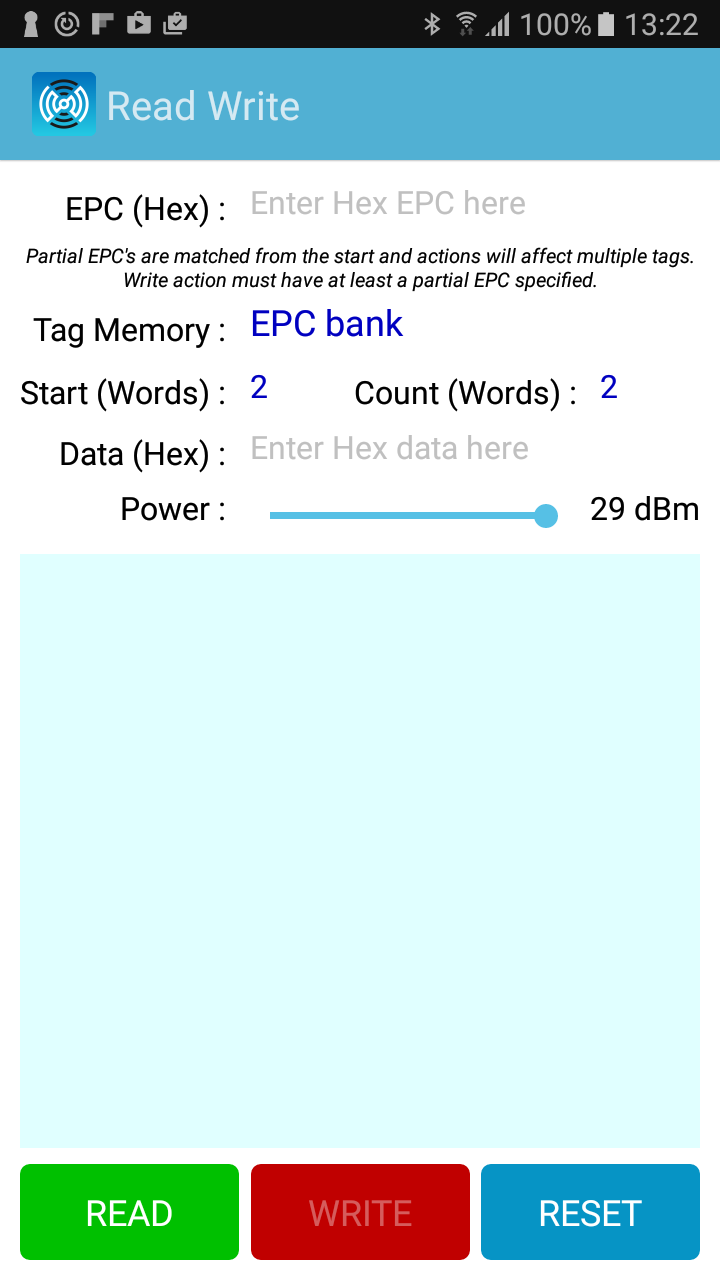
Figure 1: RFID Explorer for iOS (left) and RFID Explorer 2 for Android (right)
EPC Memory Bank Recap
Before looking at the EPC programming process it will be useful to review the layout of the tag’s EPC memory bank. The EPC memory bank holds the Electronic Product Code (EPC), the Protocol Control (PC) word and the 16-bit cyclic redundancy check (CRC). The PC word is one sixteen-bit word and defines the length as well as other properties of the EPC. The EPC is the actual identifier for the transponder (it can be many words in length). The CRC is a single word and is the checksum calculated across the PC and EPC. When stored in the EPC memory bank the first word is the CRC, the second word is the PC and the remainder of the memory bank stores the EPC. In an inventory response, the amount of the memory bank returned for the EPC is determined by the PC. Figure 2 illustrates the EPC memory banks logical structure.

Figure 2: EPC Memory Bank – Logical Layout
Process Overview
To modify the EPC of a specific, UHF tag requires writing the correct information to the tag’s EPC memory bank. When multiple tags are in range of the reader (a common scenario) then it is essential to ensure that only the correct tag is modified. The following procedure is designed to work with any standards compliant UHF tag.
- Isolate the target tag – where possible
- Select the tag to be modified using its current EPC
- Determine if the tag’s Protocol Control (PC) word needs to be modified. If so then
- Read the current value of the PC Word
- Calculate the new value of the PC word
- Write the new data to the target tag’s EPC memory bank
The steps are described in further detail below and will use an example tag with an initial 96-bit EPC value of 111122223333444455556666. All operations are performed on the Read/Write screen of RFID Explorer using the Hex mode (unless otherwise stated).
Isolate the Target Tag
Care needs to be taken when writing to a tag to ensure that only the desired tag is modified. Part of the solution is to physically isolate other, nearby tags from the Reader’s field. This can be accomplished by placing the other tags within a closed metal box or tin. Ideally the target tag will now be the only tag within range of the Reader. However, this physical isolation is not always practical so we need to also take steps to ensure that the commands used will be directed only to the target tag.
Selecting the Target Tag
Ensure that the target tag is close to the reader and all other tags are shielded by a metal box or are as far away as possible. The target tag can be selected as follows:
- iOS:
- Tap the Tag row to go to the tag selection screen
- If you know the existing EPC of the tag you wish to modify then select it from the list – this will return you to the Read/Write screen
- If multiple tags are showing, reduce the power using the slider and press the Scan for Tags button to refresh the list. Repeat until only 1 tag is showing. Tap this single tag to select it – this will return you to the Read/Write screen.
- Android/Windows UWP:
- Choose EPC Bank for the Tag Memory
- Ensure that the EPC (Hex) field is empty
- Press the Read button – this will show a list of tags in range of the reader
- If you know the existing EPC of the tag you wish to modify then tap on the EPC: line to select it from the list – this will copy the value to the EPC (Hex) field at the top of the screen
- If multiple tags are showing, reduce the power using the slider and press the Read button to refresh the list. Repeat until only 1 tag is showing. Tap this single tag to select it – this will copy the value to the EPC (Hex) field at the top of the screen
Figure 3 shows the example tag, 111122223333444455556666, after it has been selected.
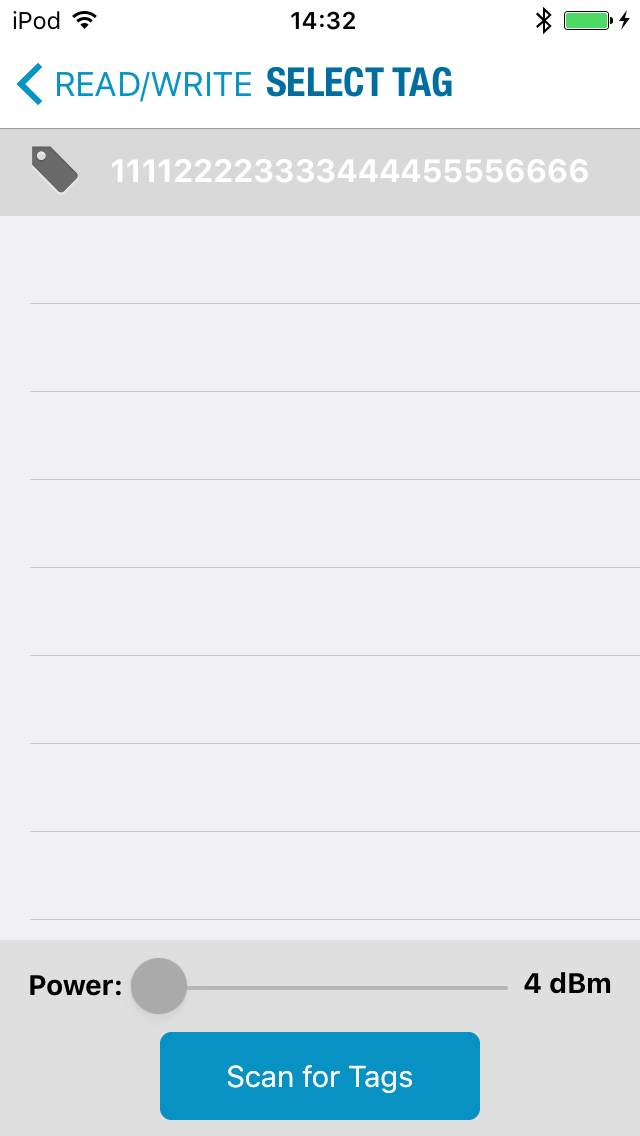
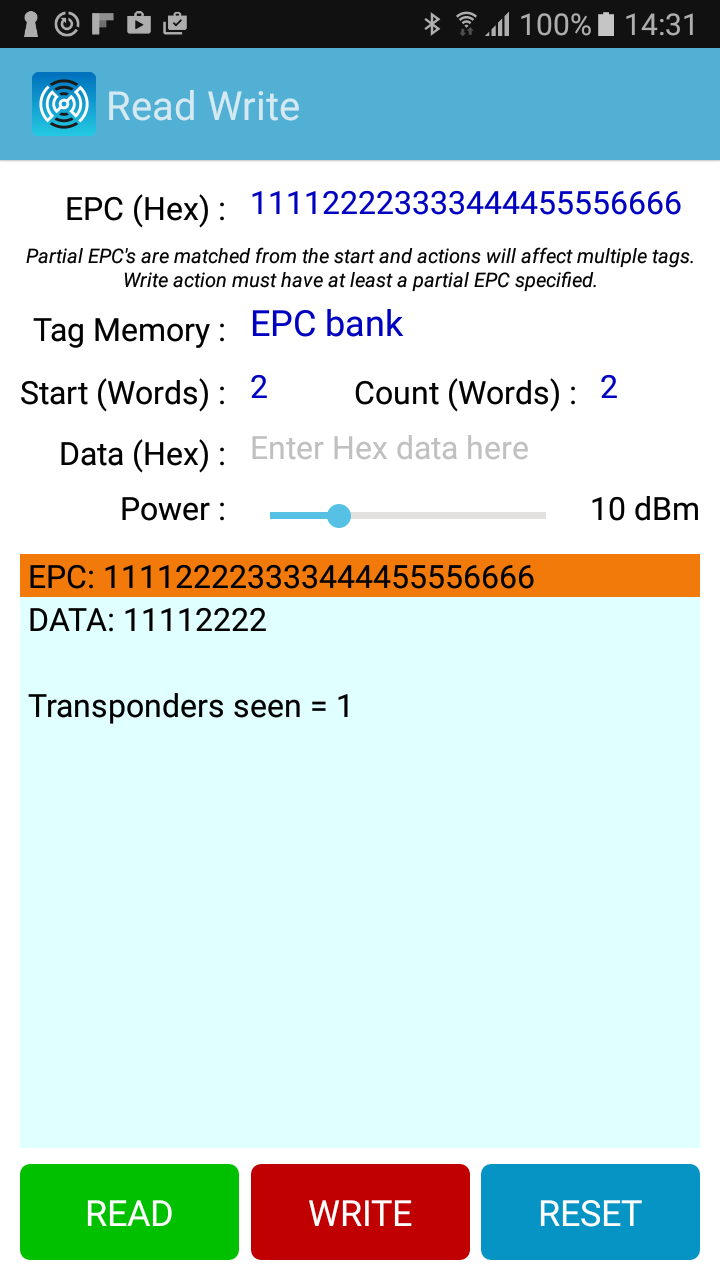
Figure 3: Selecting the target tag iOS (left) and Android (right)
Determine if the Protocol Word Should be Modified
The EPC Global UHF Gen 2 Air Interface Protocol supports EPC identifiers of variable length with the Protocol Control word of the EPC memory bank being used to specify how many words (starting from offset 2) will be reported as the EPC value – 6 words (96-bits) is a typical value.
If the tags you are using already come with the same length EPC as your new EPC values then you will only need to modify the EPC value itself. This is fairly straight-forward and is described in detail in the next section.
If you wish to change the length of the reported EPC then a little more work needs to be done as the PC word (at offset 1) contains other information that needs to be preserved when the length bits are modified. The length bits are the 5 most significant bits of the PC word (as read by RFID Explorer) so for our example tag, which has a 96-bit EPC, a typical PC word might be (length bits in bold):
3400 hex 0011 0100 0000 0000 binary 00110 = 6 words i.e. 96-bits
To change this tag to report a 64-bit EPC we would specify 4 words as the new length resulting in a new PC of:
2400 hex 0010 0100 0000 0000 binary 00100 = 4 words i.e. 64-bits
If we were to write this new PC value into the EPC memory bank (at offset 1) of the example tag we would now see the EPC value as 1111222233334444.
So, to change the length of the EPC requires the following actions:
- Read the existing PC word at offset 1 of the EPC memory bank
- iOS:
- Set the Word Address to 1
- Set the Word Count to 1
- Press the Read button
- The PC word value is shown in the results area (use the value in the Hex: section)
- Android/Windows UWP:
- Set the Start (Words) to 1
- Set the Count (Words) to 1
- Press the Read button
- The PC word value is shown in the results area as the DATA:
- iOS:
- Modify the top 5 bits to encode the new number of words in the EPC value
- Write the PC word back to offset 1 of the EPC memory bank – this can be combined with new data for the value of the EPC (as will be shown below)
Writing the new value to the EPC memory bank
So, the target tag has been isolated as best you can physically, the tag has been set as the target tag in the Read/Write screen and, if needed, the new value for the PC word has been calculated.
Next, we need to configure the rest of the Read/Write screen to write the new data to the tag.
Modifying the EPC Without Changing Its Length
If the length of the EPC is not changing, then we can simply write the new EPC value into the appropriate memory locations. We do this by specifying:
- The memory bank to write to
- The memory bank address/offset at which to write (in 16-bit words)
- The data to be written
- Note: the length of data to write is calculated automatically from the supplied data
In the examples that follow, because the naming of the UI fields and values differs across platforms, the UI fields will be presented as follows: iOS field name / Android & Windows UWP field name.
Example 1: Modify the EPC to have the value FFFFEEEEDDDDCCCCBBBBAAAA.
The new EPC value is entirely different from the existing value so we will re-write the complete EPC by entering the following values:
| Memory Bank / Tag Memory | Electronic Product Code / EPC Bank |
| Word Address / Start(Words) | 2 |
| Data to Write / Data (Hex) | FFFFEEEEDDDDCCCCBBBBAAAA |
The screen prior to writing the new EPC value is shown in Figure 4
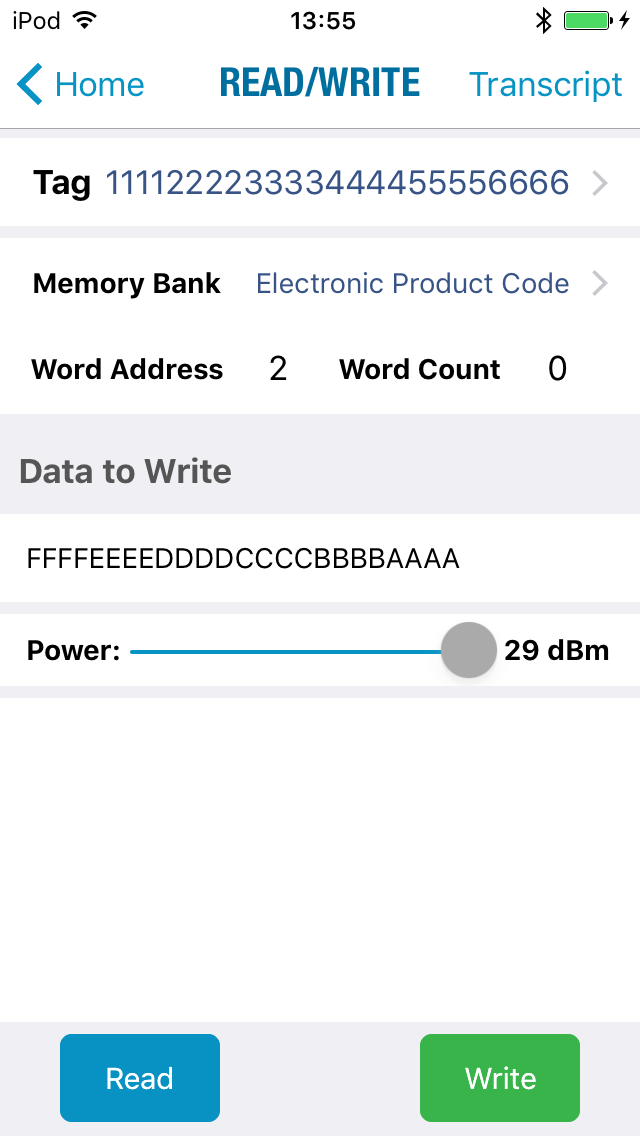
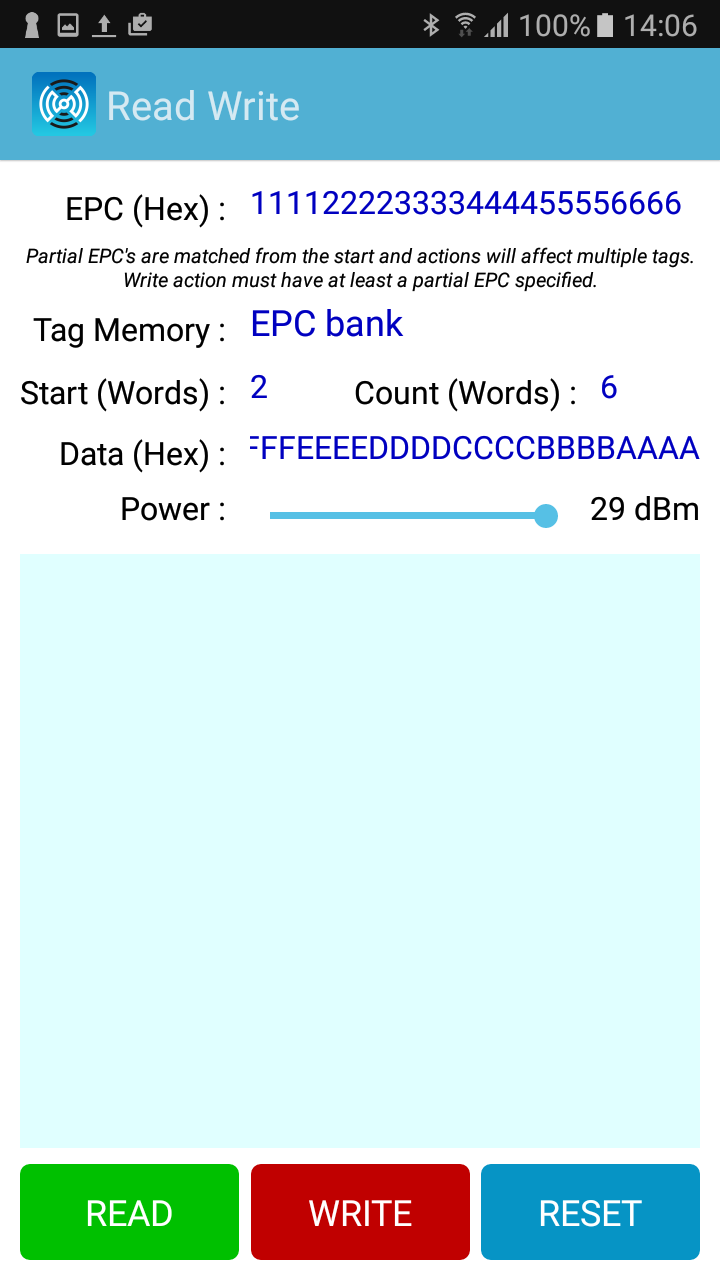
Figure 4: RFID Explorer ready to write a new EPC value
Tap the Write button to modify the tag. RFID Explorer will give the following output when successful:
iOS:
Transponder written successfully
EPC changed - reselect target tag
Android/Windows UWP:
EPC: 111122223333444455556666
WRI: 6 Words
Transponders seen = 1
If you wish to modify the same tag again you will need to re-select it as the EPC will now have the (new) value: FFFFEEEEDDDDCCCCBBBBAAAA.
Example 2: Modify the EPC to have the value 111122223333444455550000.
The new EPC value only requires that the last word be changed so we can do this by only writing the changed data – this will be slightly faster than re-writing the complete EPC:
| Memory Bank / Tag Memory | Electronic Product Code / EPC Bank |
| Word Address / Start(Words) | 7 |
| Data to Write / Data (Hex) | 0000 |
Tap the Write button to modify the tag. RFID Explorer will give the following output when successful:
iOS:
Transponder written successfully
EPC changed - reselect target tag
Android/Windows UWP:
EPC: 111122223333444455556666
WRI: 1 Words
Transponders seen = 1
When Write Goes Wrong
RFID Explorer uses a very robust writing mechanism and in most cases the new EPC value will be successfully written. However, occasionally, a write may fail giving a report like this:
iOS:
Failed to complete Write:
Write failed
Android/Windows UWP:
EPC: 111122223333444455556666
WRI: 5 Words
Error: CrcErrorOnTransponderResponse
Transponders seen = 1
When this occurs the tag’s EPC might have been unchanged but is more likely to have been partly modified so, you will need to identify the partially modified tag. The EPC for the partially modified tag will start with digits from the new EPC value but will probably still contain digits from the old EPC value.
For example, (partially written data in bold):
|
EPC before write: |
111122223333444455556666 |
|
New EPC Value: |
FFFFEEEEDDDDCCCCBBBBAAAA |
|
Possible EPC After Failed Write: |
FFFFEEEEDDDDCCCCBBBBAAAA FFFFEEEEDDDDCCCCBBBB6666 FFFFEEEEDDDDCCCC55556666 FFFFEEEEDDDD444455556666 FFFFEEEE3333444455556666 FFFF22223333444455556666 111122223333444455556666 |
To correct a failed write simply select the tag, using the partially written EPC, and attempt the write again.
If writes repeatedly fail and the EPC is completely unchanged then it is likely that the tag EPC memory is either locked (and requires a password to be written) or perma-locked (cannot be changed, ever!).
The ability to modify password-protected tags is coming to a future version of RFID Explorer.
Modifying the EPC To Be a Different Length
To change the length and value of the EPC requires writing a modified PC word and the changed data – as the PC word and the EPC memory are adjacent in the EPC memory bank it is often easiest to write both values in one command.
Example 3: Modify the EPC to have the value FFFFEEEEDDDDCCCC.
The new EPC value is shorter (64-bits) and different to the existing value so we need to determine the current PC word, modify it to include the new length and then rewrite the PC word and 4 words of the new EPC value in one command.
We can use the Read operation to obtain the current value of the PC Word from EPC memory bank, offset 1. For our example tag the value is 3000 (hex) but other tags may well have non-zero values in the lower bits which will need to be preserved when adjusting the length.
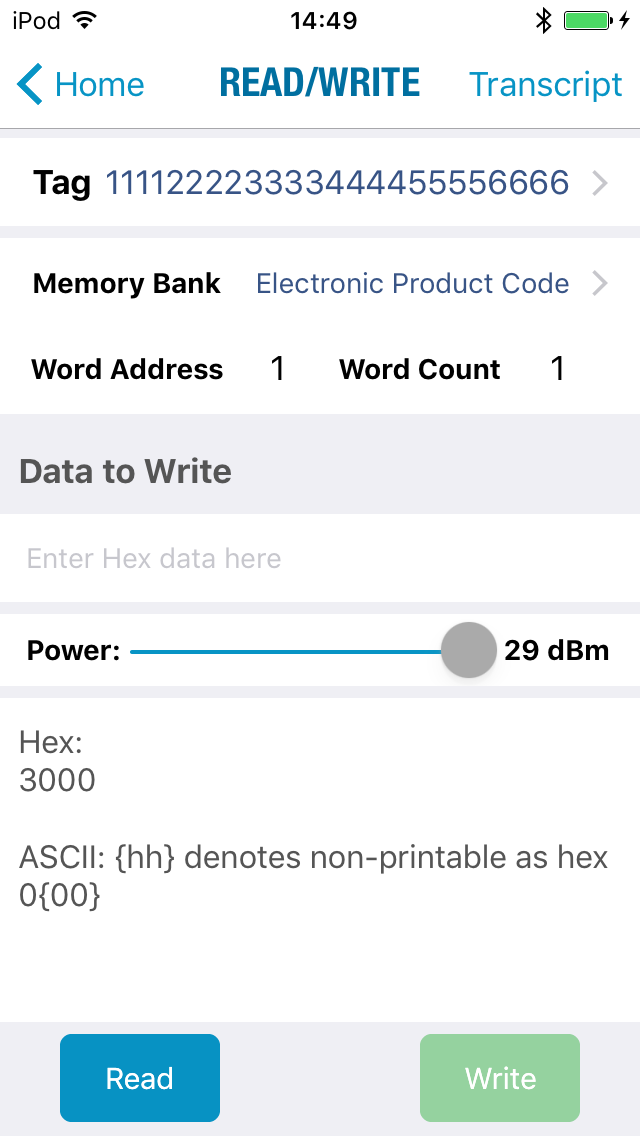
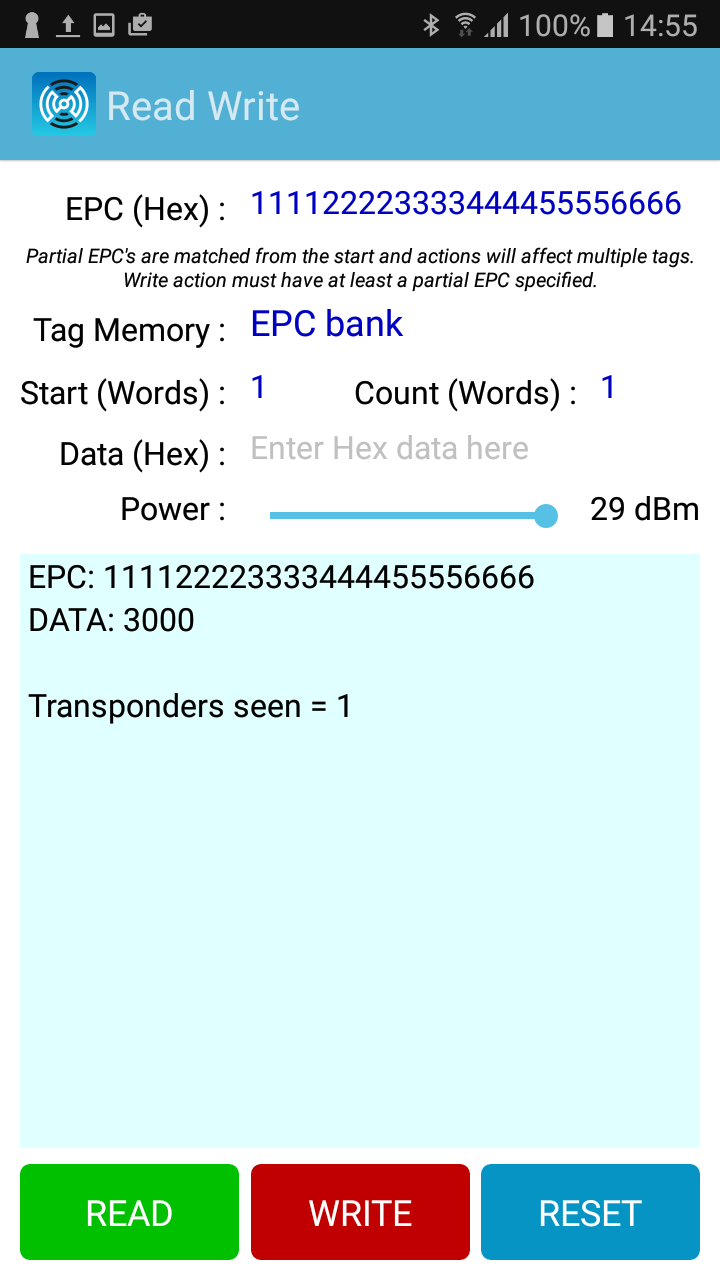
Figure 5: Reading the PC Word
Modifying the top 5 bits to represent a length of 64-bits i.e. 4 words we get the new PC value of 2000 hex (See section Determine if the Protocol Word Should be Modified for more details).
We can now join this to the start of the new EPC value to specify a single data block to be written:
2000FFFFEEEEDDDDCCCC
This value will re-write the both the PC Word and the complete EPC. We do this by entering the following values in to the Read/Write screen:
| Memory Bank / Tag Memory | Electronic Product Code / EPC Bank |
| Word Address / Start(Words) | 1 |
| Data to Write / Data (Hex) | 2000FFFFEEEEDDDDCCCC |
Notice that this write now starts at offset 1 where the PC word resides.
Tap the Write button to write the new EPC. Upon successful completion, the tag will now have the 64-bit EPC value of FFFFEEEEDDDDCCCC.
Summary
A basic outline of the procedure for successfully writing to the EPC of a tag was presented. We have seen that a combination of physical isolation and selecting a single tag can ensure that only the desired tag responds to a write command. Also, a detailed description of how to modify the EPC, both with and without changing the length of the EPC, was provided. All the actions described in this article were performed using the free RFID Explorer App from Technology Solutions (UK) Ltd.